VS Code (Visual Studio Code) is one of the most popular code editors on the planet. Thanks to its huge library of extensions, it can be used with almost any software language. Developed by Microsoft and available on Windows, Linux, and macOS, it’s one of the most versatile source-code editors out there.
Because VS Code is a general-purpose editor, you’ll need to follow a few extra steps before you can start coding the Micromelon Rover using Python.
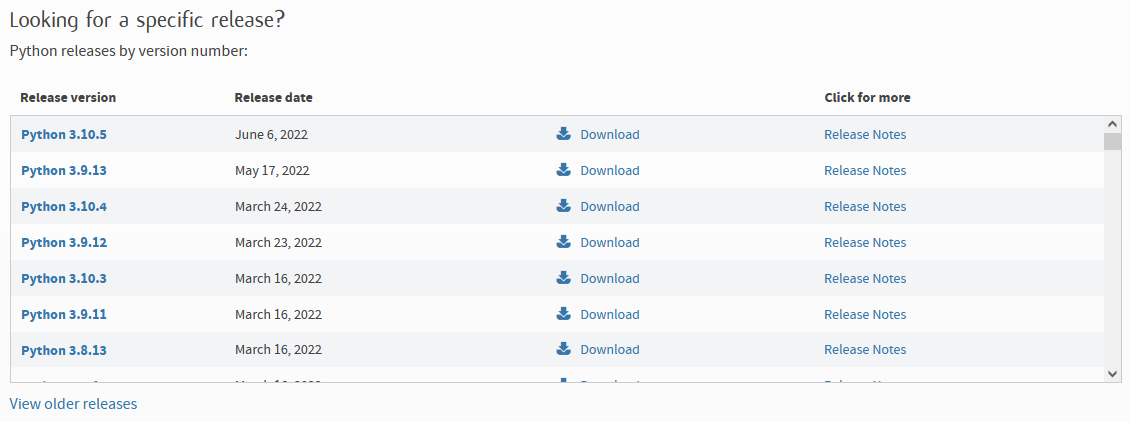
1Download Python
- Visit python.org/downloads and find the "Looking for a specific release?" section.
- Click the Download link next to a Python version equal to or above 3.8.
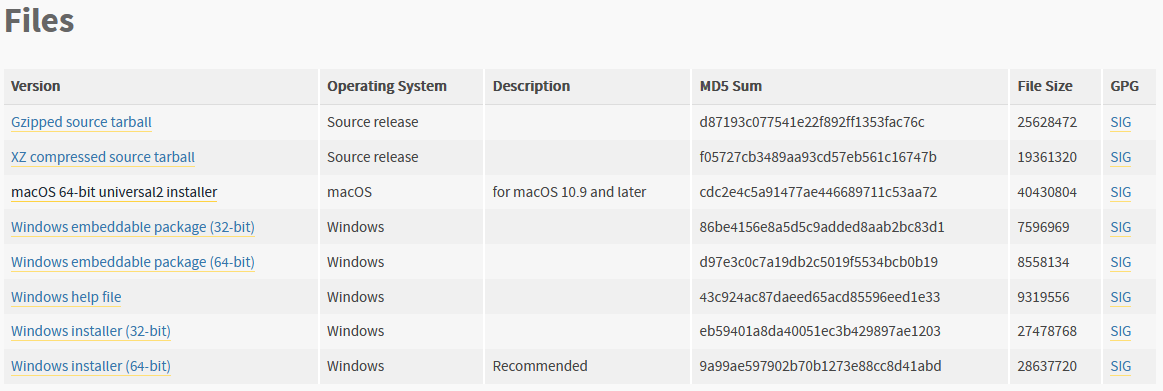
2Choose the Installer
- Scroll to the bottom of the release page until you find the Files section.
- Click on the installer corresponding to your computer. For a 64-bit Windows machine, choose Windows installer (64-bit).
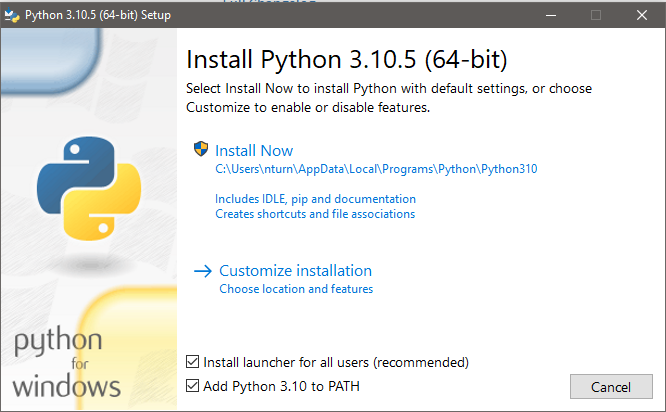
3Run the Python Installer
- Double-click the downloaded installer to open the Python Setup window.
- Tick the Add Python 3.XX to PATH checkbox at the bottom.
- Click Install Now.
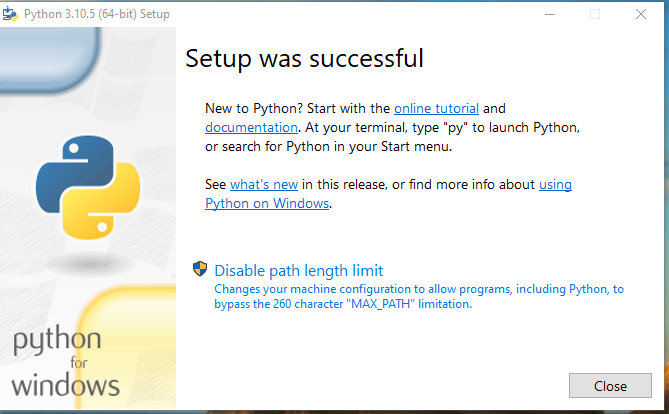
4Disable Path Length Limit
- Once installation completes, the "Setup was successful" screen appears.
- Click Disable path length limit to ensure Python is accessible from the command prompt.
- Click Close.
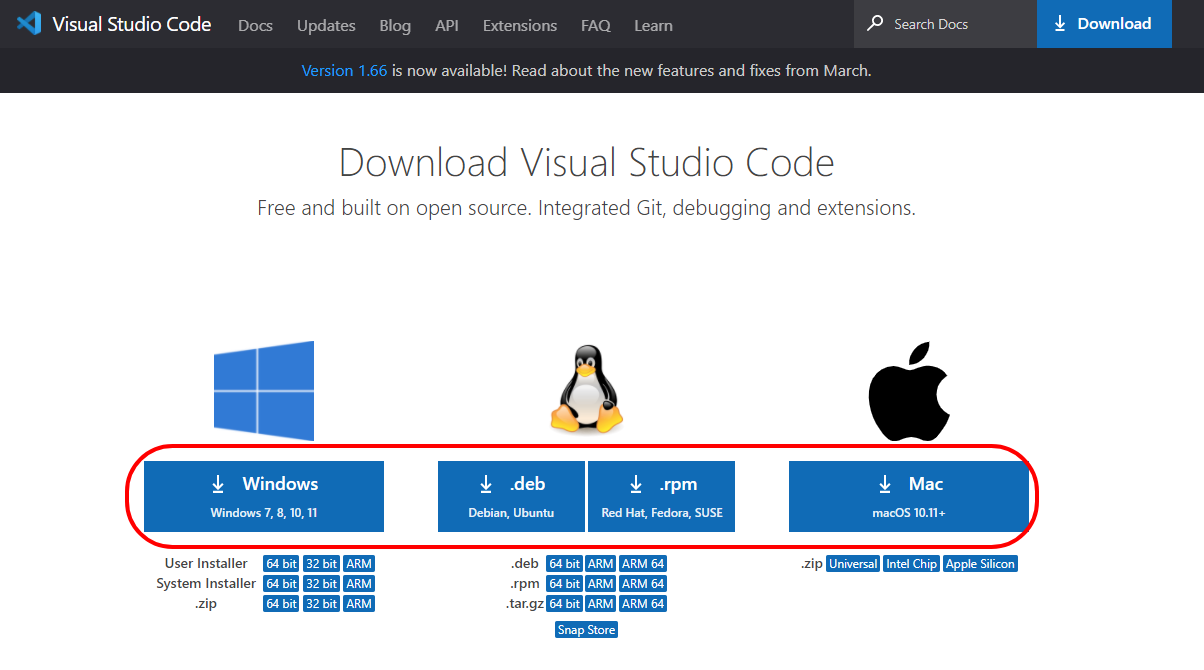
5Download VS Code
- Visit code.visualstudio.com/download.
- Click the download button for your operating system (Windows, Linux, or macOS).

6Install VS Code
- Double-click the downloaded installer and click Next through the setup wizard.
- On the Select Additional Tasks screen, ensure the following are ticked:
- Add "Open with Code" action to Windows Explorer file context menu
- Add "Open with Code" action to Windows Explorer directory context menu
- Register Code as an editor for supported file types
- Add to PATH (requires shell restart)
- Click Next and complete the installation.

7Install the Python Extension
- Open VS Code and click the Extensions icon on the left-hand sidebar.
- Type python into the search bar.
- Select the Python extension by Microsoft and click Install.
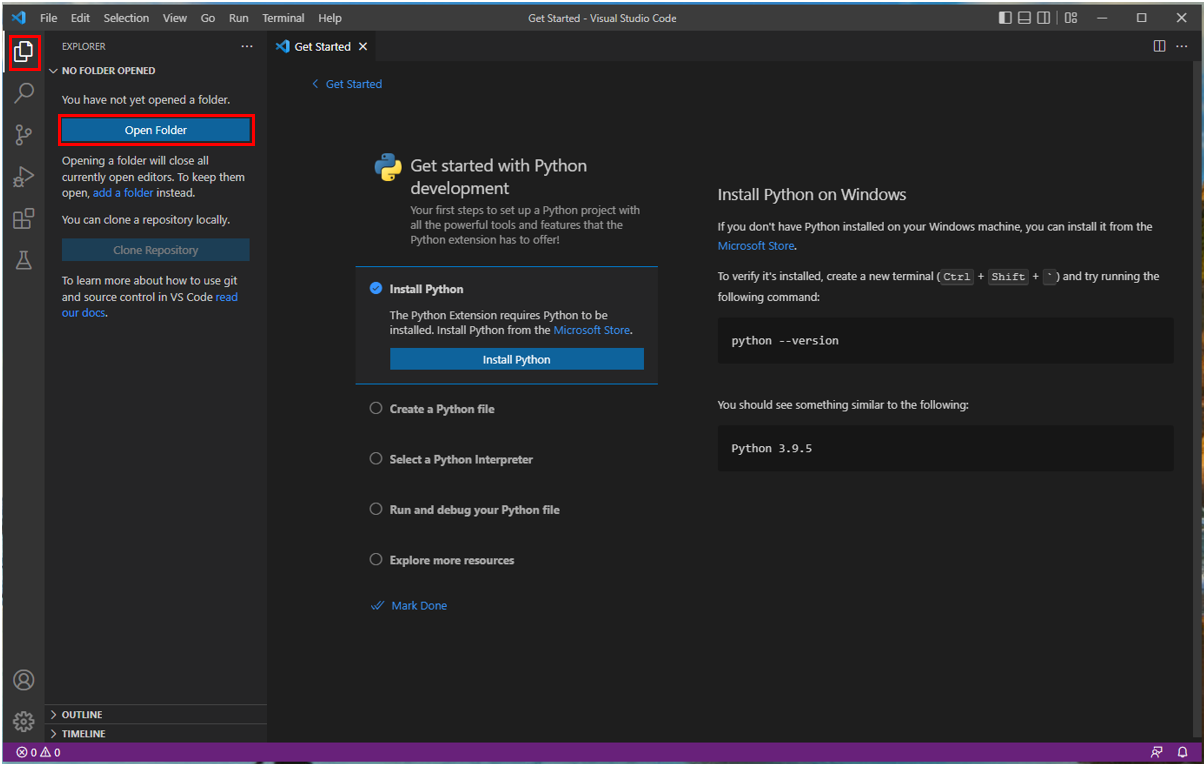
8Open a Project Folder
- Click the Explorer icon on the left-hand sidebar to return to the project tab.
- Create a folder on your computer where you will save your project.
- Click Open Folder and select the folder you created.
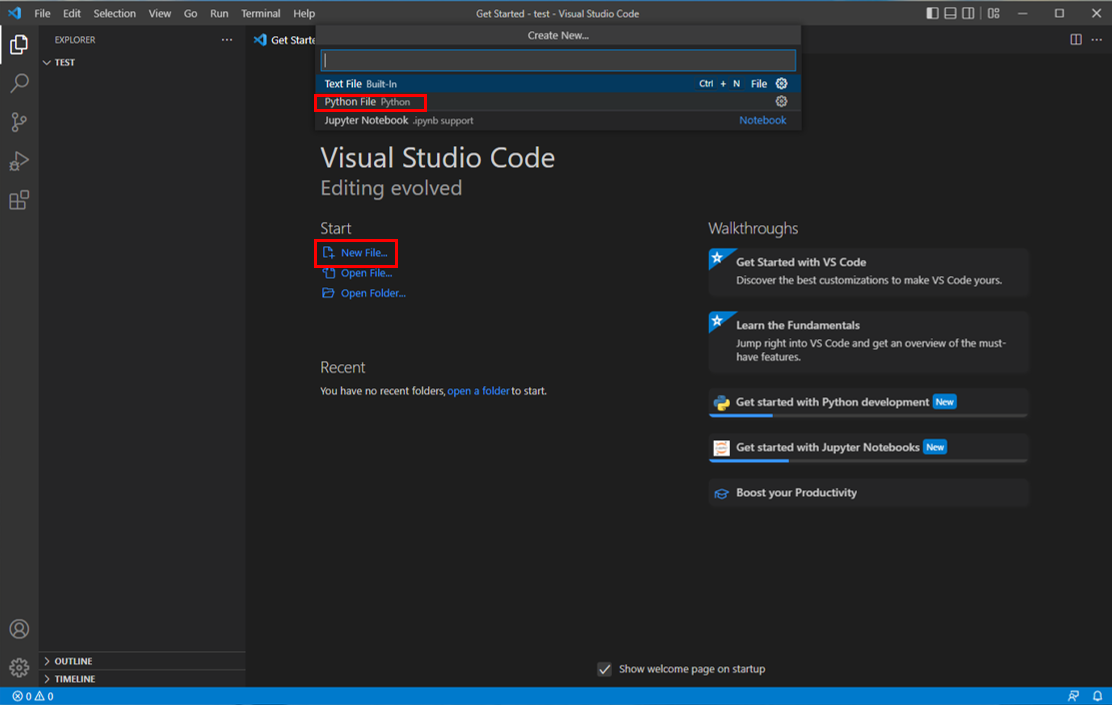
9Create a Python File
- Click New File in the Explorer panel.
- Select Python File from the dropdown to create a new
.pyfile.
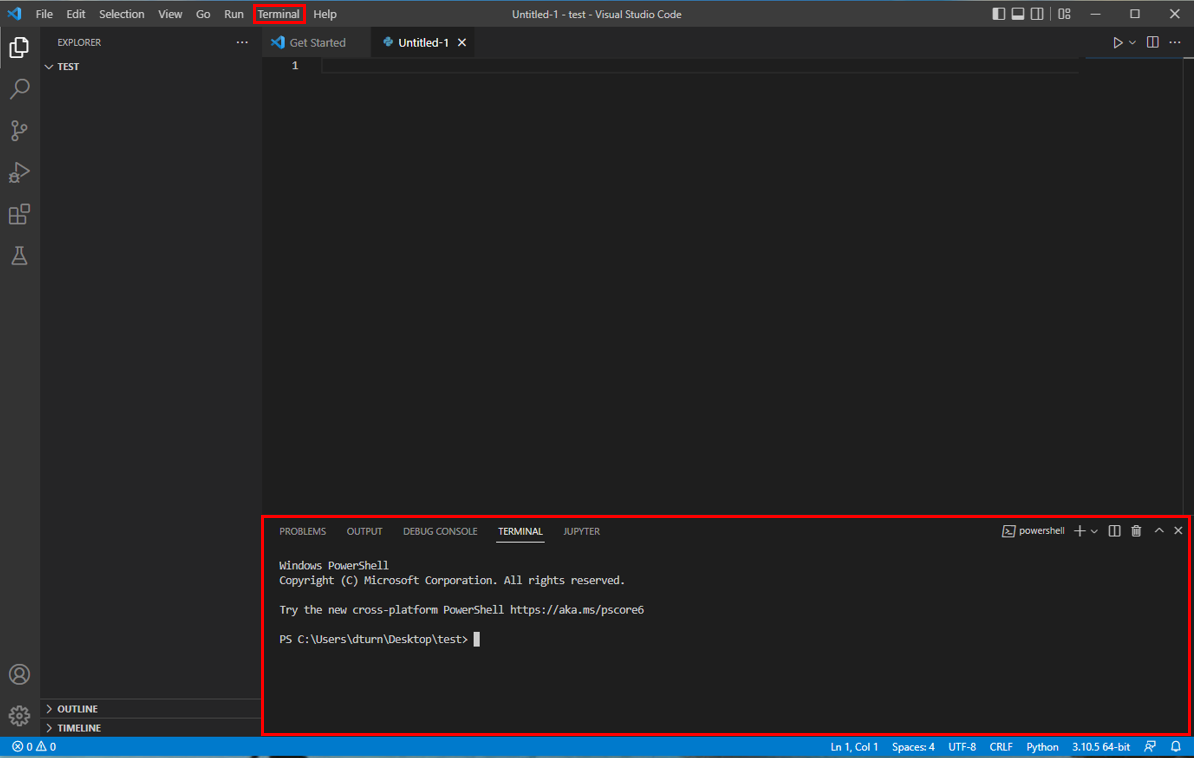
10Open the Terminal
- Click Terminal in the top menu bar, then select New Terminal.
- A terminal panel will appear at the bottom of the VS Code window.
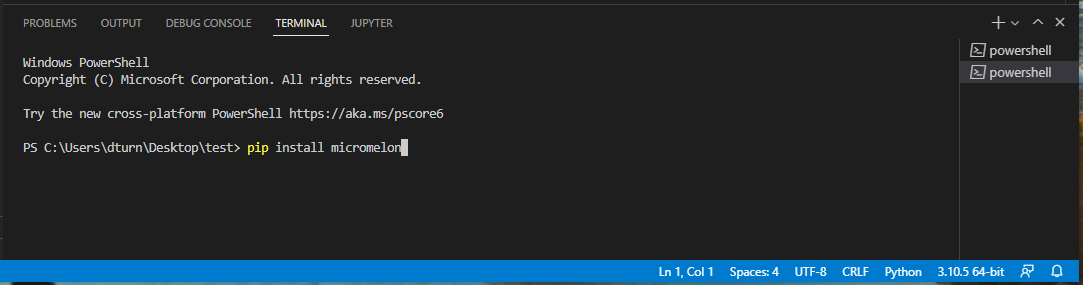
11Install the Micromelon Package
- Click on the terminal panel and type
pip install micromelon, then press Enter. - Wait for the package to finish downloading and installing.
You're Done!
You have completed all the steps required to set up VS Code to use Python and the Micromelon Python Module. Follow our guide to make your first Rover program.