Using Classroom Management Features
The Micromelon Rover and Code Editor have built-in classroom management features that give teachers more flexibility to organise and run their lessons. This post will explore what these features are, and how to make the most of them.
Opening Class Controls & Selecting Your Class
Opening class controls & selecting a class
Before you can use any class controls, you must select the class to which you want them to apply. When a class control is activated, only students inside the selected class will be affected.
Who can control what?
Standard teacher accounts can select and control all of the classes in the school that they are in. Casual instructor accounts can only control classes that they have been assigned to. Student accounts can never access class controls.
What Class Controls Are Available?
Disabling and Muting Student Rovers
You can disable and/or mute all student Rovers. While the Rovers are disabled, students can still interact with the Code Editor, but they will not be able to run any code. While the Rovers are muted, the Rovers and Code Editor will function normally, however the Rovers will not produce any sounds requested from student code.
Note: Both these controls are toggled on for 5 minutes when first pressed. To extend the time press the +5 mins button.
Hiding Student Screens
If you need to grab the attention of the class, you can hide their screens! This will cover their Code Editor and stop their Rover if it is currently running. This will only hide the Code Editor, they will still be able to see other programs opened on their laptop.
Note: Hiding student screens will also last for 5 minutes when first pressed. To extend the time press the +5 mins button.
Student View
Teacher View
Sharing Your Screen With The Class
If you want to show your students what is currently on your Code Editor, you can broadcast your current Code Editor workspace to your current class. Students will not be able to edit your code. If you would like to send them code that they can edit, we will cover that shortly.
Note: By default this screen share is unlocked. This means students can select other projects in the code editor. If you want students to only be able to look at your code, press the Lock button once the control is active.
Student View
Teacher View
Restricting What Code Students Can See And Edit
The Micromelon Code Editor has simultaneous block and text coding. Users can either choose between seeing just blocks, just text or both. If you want to restrict what your classroom can see and edit, you can lock your class to only be able to see a specific view or only allow them to edit in a specific way.
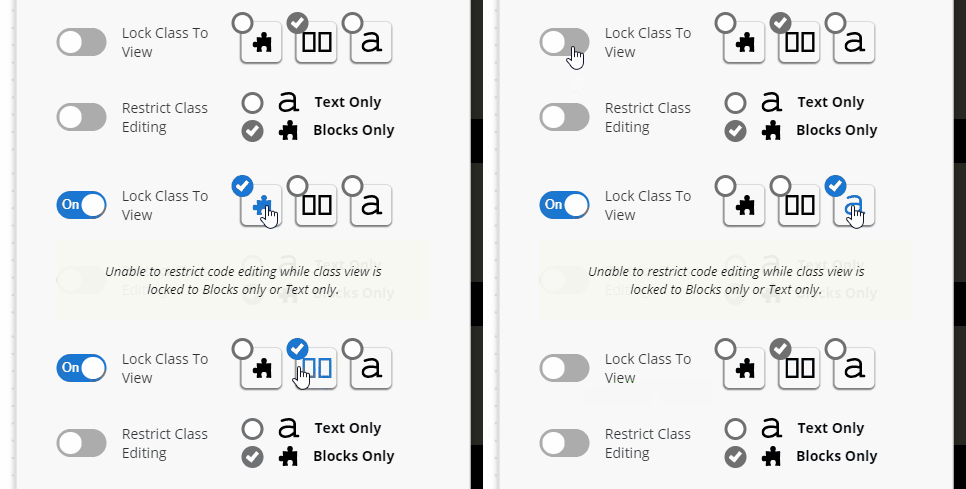
Restrict What Students Can See
You can choose if students can see only blocks, only code or both. They will still be able to edit both code types if they are locked to mixed view.
Student View
Teacher View
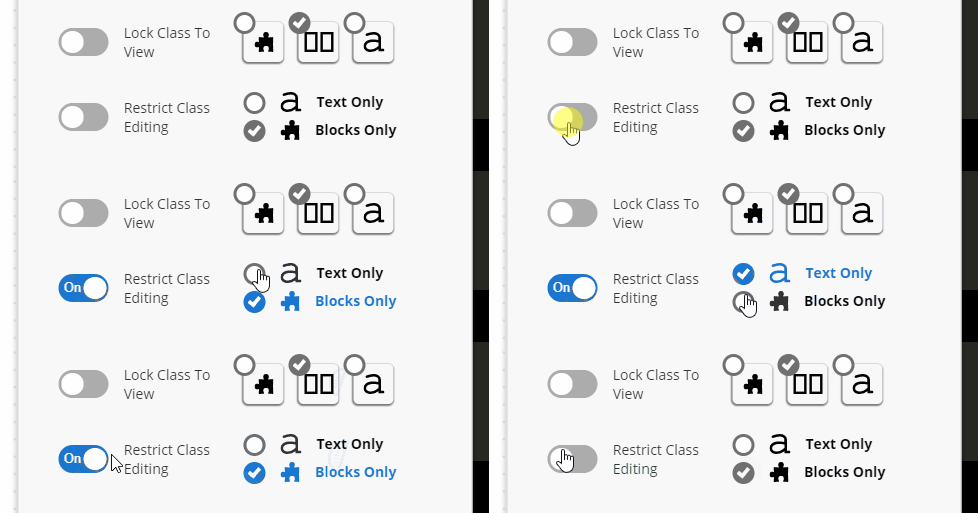
Restrict What Students Can Edit
You can restrict what type of code students are able to edit. If you want to challenge students, you could restrict them to only be able to edit text code. Students will still see the block code (which is useful for debugging), but they won’t be able to edit the blocks.
Student View
Teacher View
Sending Code To Students
You can send your projects and code to students. They will have a duplicate of this project added to their workspace and will have full control to edit it, rename it, or delete it. If you want to share your screen with your class without students being able to edit the project, see the previous section on sharing your screen.
How To Send A Project
Locate the project you want to send in your project tab bar.
Click the three vertical dots or right click the tab to open the project menu.
Select Send To Class or Send To Student.
Select Send To Class to send this project to an entire class.
Select Send To Student to send it to specific students. You can choose from all of the students in the school.
Opening Student Work
If you want to see what a student is working on, you can open a folder in your Code Editor that contains of all their projects. This folder will continuously update to the latest version of the student’s work.
Note: You cannot edit the code in the student’s projects or delete these projects from the student’s Code Editor remotely.
How To Open Student’s Work
From the teacher dashboard go to the Classes tab and select your class.
Locate the target student/s in the class list on the right. Click the + button for all the students whose work you wish to view. This will open their folder in your Code Editor.
Close the teacher dashboard and you will see the folder/s in your project tab bar. Move your mouse over the folder to see all projects inside. Click the project you wish to see.
To remove a folder, press the - button on the folder.
Individual Student Controls
Most of the controls we have discussed so far will impact your entire class. If you prefer, you are able to set these controls to impact individual students rather than your whole class.
How To Set Controls For Individual Students
From the teacher dashboard, navigate to the class tab and select your class.
In the class list there will be all of the students in your class. Press the expand arrow at the far right of the student entry. This will expand and you will see all the same controls that are available for the class.
Select the restrictions you want to apply to this student.
Note: You can use both class wide and individual controls at the same time. Your individual controls will always overwrite the class controls. If you want revert a student that is impacted by individual controls to the class’s current status, click the revert button located next to the expand arrow on their entry.


